Photoshop and ImageReady use a system of 25 floating palettes to group items and controls such as brushes and tool options. You can open and close palettes on demand and easily compress or expand them to optimize your workspace.
1. Examine a Group of Palettes
To open a palette in ImageReady or Photoshop, open the Window menu and then select the palette you want to launch. To optimize your workspace, the application groups multiple palettes in a single window and separates them with tabs. If the palette you want is hidden, click its tab to bring it to the front of the window.
2. Collapse and Expand a Palette
To collapse or expand a palette in Windows, click the Minimize/Maximize button. On a Mac, click the green Resize button. To collapse a palette all the way down to only the tab names, double-click the tab. Double-click again to fully expand the palette.
3. Resize a Palette
To resize most palettes (some cannot be resized), click and drag the lower-right corner of the window. To return a palette to its default size, click the Minimize/Maximize button (Windows) or the green Resize button (Mac).
4. Tools and the Options Bar
The Options bars in ImageReady and Photoshop vary depending on the tool selected in the toolbox. By default, the Options bar runs across the top of the screen, docked just below the menu bar. Should you close it, you can reopen it by selecting Window, Options or by double-clicking a tool in the toolbox.

5. The Palette Menu
A palette menu lists options related to the functionality of the associated palette. To open any palette menu, click the black triangle in the upper-right corner of the palette; click again to make a selection from the list of options.
6. Use the Palette Shortcut Buttons
At the bottom of some palettes are shortcut buttons for easy access to common tasks. To find out what each button does, first make sure that the Show Tool Tips option is selected in the Options section of the General Preferences box (select Edit, Preferences, General). With this option turned on, you can then simply position your mouse pointer over a button to read the description. See Task 10, "How to Set Photoshop Preferences," for more information.
Friday, August 31, 2007
How to Use Photoshop and ImageReady Palettes
How to Use the Menu Bars
The menu bars in Photoshop and ImageReady operate like the menu bars in any other application. Click the menu name so that the menu drops down; then click any option to select it. Select an option that has a solid right-facing arrowhead, and a submenu pops out. Select an option that has a three-dot ellipsis (…) following it, and a dialog box opens. This task looks at the grouping of the various menus to help you understand the functionality associated with each one.
1. The Photoshop File Menu
You use the Photoshop File menu to address the basic opening, closing, and saving of files. This menu covers the import/export of files, workflow management and automated tasks, as well as page setup and print options. It also contains the Exit command (Quit on the Mac) for closing the application. Note: Photoshop for Mac OS X features a Photoshop menu that includes the Preferences, Hide, and Quit commands.
2. The Photoshop Edit and Image Menus
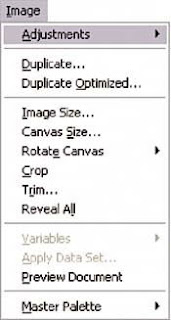
You use the Photoshop Edit and Image menus to specify most of the standard global changes to an open image. You'll find controls for cut and paste, transformations, fill, stroke, pattern, preferences (Windows users only; Mac users find preferences in the Photoshop menu), and color settings on the Edit menu. On the Image menu, you'll find options for color mode, adjustment options, crop, canvas size, and image size.

3. The Photoshop Layer Menu
The Photoshop Layer menu covers all the layer optionscreating and deleting layers, merging layers, applying layer effects, and clipping masks. You can find most of these same controls on the Layers palette menu.
4. The Photoshop Select Menu
You use the Photoshop Select menu to control selection options within the program. These options include inverting selections, feathering, selection modifiers, and saving and loading selections.
5. The Photoshop Filter Menu
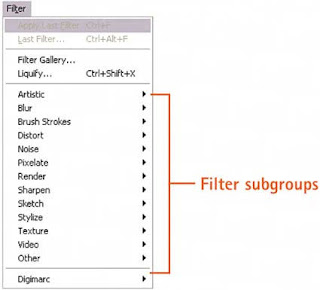
Simply put, the Photoshop Filter menu contains all the native Photoshop filters, divided into four filter interface groups and 14 subheadings. The Filter menu also can include any third-party filters you might have loaded in the Photoshop plug-ins folder.
6. The Photoshop View and Window Menus
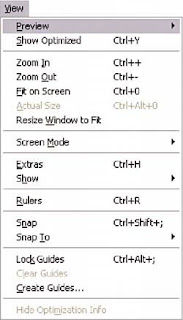
You use the View menu to control zooming and previews, as well as the visibility of rulers and guides. The Window menu lets you launch and close any of the 19 palettes. In addition, the Window menu lists all open file windows so you can move a file to the front of the screen simply by choosing it from this menu.

7. The Photoshop and ImageReady Help Menus
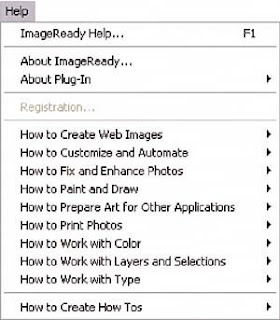
The ImageReady and Photoshop Help menus let you launch Adobe's Help Center. The Photoshop version provides access to the two file wizards as well as the Adobe Online and Adobe Updates services. Both versions also have several How-to tips.
8. The ImageReady File Menu
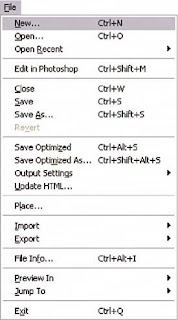
You use the ImageReady File menu to open, close, and save files, as well as to save files optimized as GIFs or JPEGs. This menu also covers the import and export of files, HTML browser previews, and recent files. The File menu also contains the Exit command (Quit on the Mac) for closing the application.
9. The ImageReady Edit and Image Menus
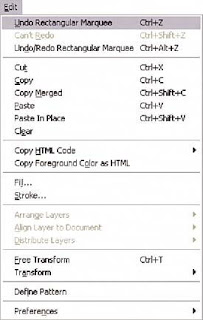
You use the ImageReady Edit and Image menus to control most of the standard global changes to an open image. Controls for cutting and pasting image data and HTML, as well as options for transformations, fill, stroke, pattern, and setting preferences are located on the Edit menu. The Image menu is more limited than its Photoshop counterpart; it offers canvas and image size controls, as well as a few adjustment options.
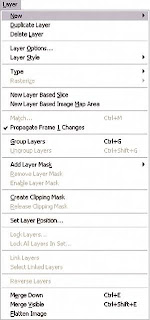
10. The ImageReady Layer Menu
The ImageReady Layer menu covers all the layer optionscreating and deleting layers, merging, applying layer styles, and grouping. It also offers control over layer-to-imagemap conversion, slice and image map layer creation, and precise layer placement and locking. You can find many of these same controls in the Layers palette menu.
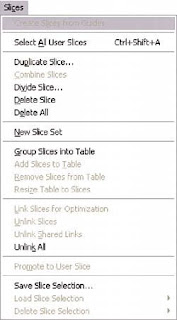
11. The ImageReady Slices Menu
The Slices menu specifies the handling of image slices. A slice is the portion of the image when ImageReady divides an image into smaller pieces for optimization and display in an HTML table. This menu specifies how image slices are created, modified, linked, and deleted. You can also preview JavaScript rollovers and link slices and slice selections. If it has to do with slices, you'll find that option on this menu.
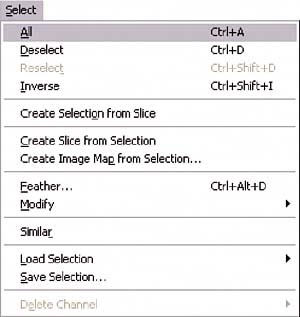
12. The ImageReady Select Menu
You use the ImageReady Select menu to control selection options within the program. These options include inverting selections, feathering, selection modifiers, and saving and loading selections.
13. The ImageReady Filter Menu
The ImageReady Filter menu contains 101 filters divided into 14 subheadings. This menu also includes Liquify, the Filter Gallery, and any third-party filters you might have loaded into the plug-ins folder.
14. The ImageReady View and Window Menus
You use the View menu to control zooming and previews as well as the visibility of rulers and guides. The Window menu lets you launch and close any of the 19 ImageReady palettes. In addition, it also lists all open file windows and all the window arrangement commands.
